When it comes to manufacturing and quality control, ensuring that products meet specific standards is crucial. The Acceptable Quality Level (AQL) is a key concept that helps companies maintain these standards by determining the maximum number of acceptable defects in a batch of products.
This method allows businesses to strike a balance between quality and efficiency, ensuring that products are safe, functional, and visually pleasing before reaching the customer.
This blog post will provide an overview of the Acceptable Quality Level, including its definition, categories of defects, sampling processes, and the AQL table.
What is Acceptable Quality Level?
It is a standard method used in quality control to establish the maximum number of defective items permissible within a batch of products.
It helps decide whether a batch meets the required quality standards. Essentially, it sets the limit for the worst acceptable quality level that can still be considered acceptable during inspections.
If the number of defects in the sample is within this limit, the entire batch is accepted; if it exceeds the limit, the batch is rejected. This ensures that the products meet the necessary quality criteria before reaching customers.
It is defined in ISO 2859-1 as a “quality level that is the worst tolerable.”
It can also refer to the acceptable quality limit, a method used for sampling inspection that determines whether a sample of some product meets specific requirements.
While doing a random sampling quality inspection, AQL helps you know how many defective products are acceptable. Therefore, it is always indicated as a ratio of the number of defects compared to the total lot or quantity.
How Does It Work?
It works by randomly selecting a sample of goods from a batch and inspecting them for defects. Here’s how the process typically unfolds:
- Sampling: A random sample of items is taken from a larger batch.
- Inspection: Each item in the sample is checked for defects.
- Counting Defects: The number of defective items in the sample is counted.
- Comparison with AQL: This number is compared to a predetermined acceptable quality level, which specifies the maximum number of defects allowed.
- Decision:
- Accept: If the number of defects is within the AQL limit, the entire batch is accepted.
- Reject: If the number of defects exceeds the AQL limit, the batch is rejected.
If a batch is rejected, manufacturers will analyze the production process to identify and correct the sources of defects. This continuous monitoring and adjustment help maintain product quality and improve manufacturing processes.
Acceptable Quality Level Example
As an example, imagine a production run with an AQL of 2%. This means that no more than 2% of the products in the batch can be defective.
If the production run consists of 500 items, then only 10 items can be defective. If 11 or more items are found to be defective, the entire batch will be rejected. The threshold of 11 defective items is referred to as the rejectable quality level (RQL).
Categories of Defects in the AQL
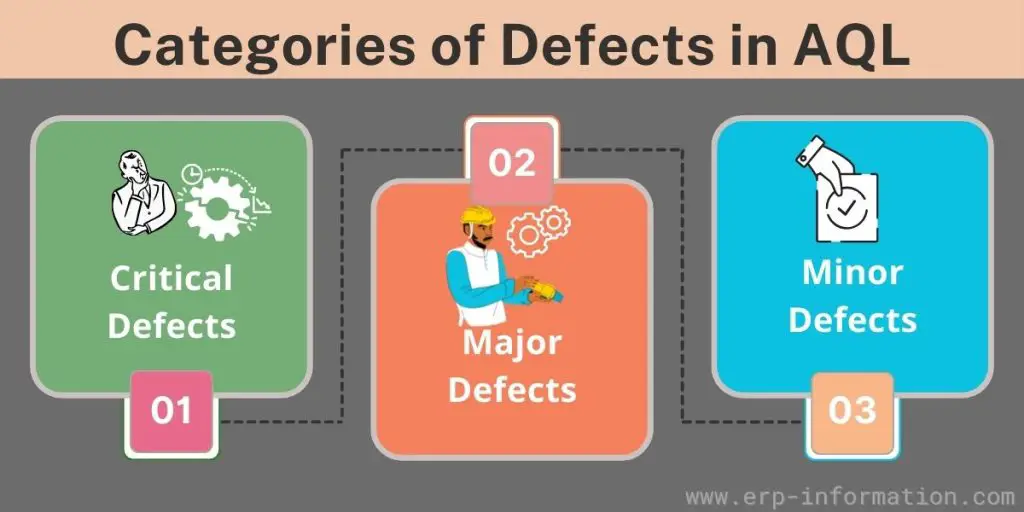
There are three main categories of defects that can be found in a lot:
- Major defect
- Minor defect
- Critical defect
Major defect
A major defect is a flaw in the product that renders it unsuitable for its intended use. This defect can cause the product to be unsafe, unusable, or aesthetically displeasing.
The typical AQL for major defects is 2.5%
Minor defect
A minor defect is a flaw in the product that does not meet its standards but does not render it unusable, unsafe, or aesthetically displeasing.
The typical AQL for minor defects is 4%
Critical defect
A critical defect is a flaw in the product that meets none of the above criteria and affects at least one unit. Critical defects can result in unsafe, unusable, or aesthetically displeasing products.
Manufacturing is smooth if the production level yields defective pieces within the AQL range.
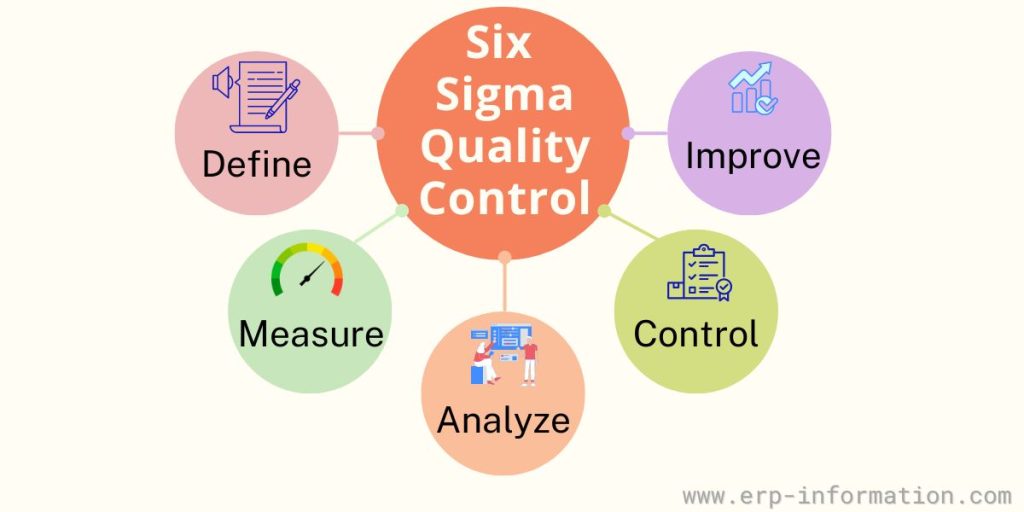
If the number of rejections is higher than the set level, then the whole batch will be rejected, and you come to know that the manufacturing processes will have to be reviewed, and the defect-causing areas have to be rectified. So it is an essential tool in Six Sigma quality control.
The acceptable quality level depends on the type of product and differs from product to product and industry to industry.
Products used in building airplanes will have very little AQL compared to those that manufacture toys.
For example, a manufacturing company can set an AQL of 1% on a lot, but a Pharmaceutical company could set an AQL of 0.001% or 0% on a lot because defective products can be risky for health.
Hence, it is first essential that the AQL is calculated based on the appropriate size, sample, and industry.
AQL in Practice
We know that AQL means the worst quality level. It represents the highest percentage of defects that can be considered satisfactory. The likelihood of accepting a lot that meets the AQL should be high. However, apart from that, the quality control department has two more quality levels.
RQL (Rejectable Quality Level): This is known as an unsatisfactory quality level or lot tolerance percent defect (LTPD).
IQL (Indifference Quality Level): This level lies between RQL and AQL. This will be different for different companies.
AQL Table
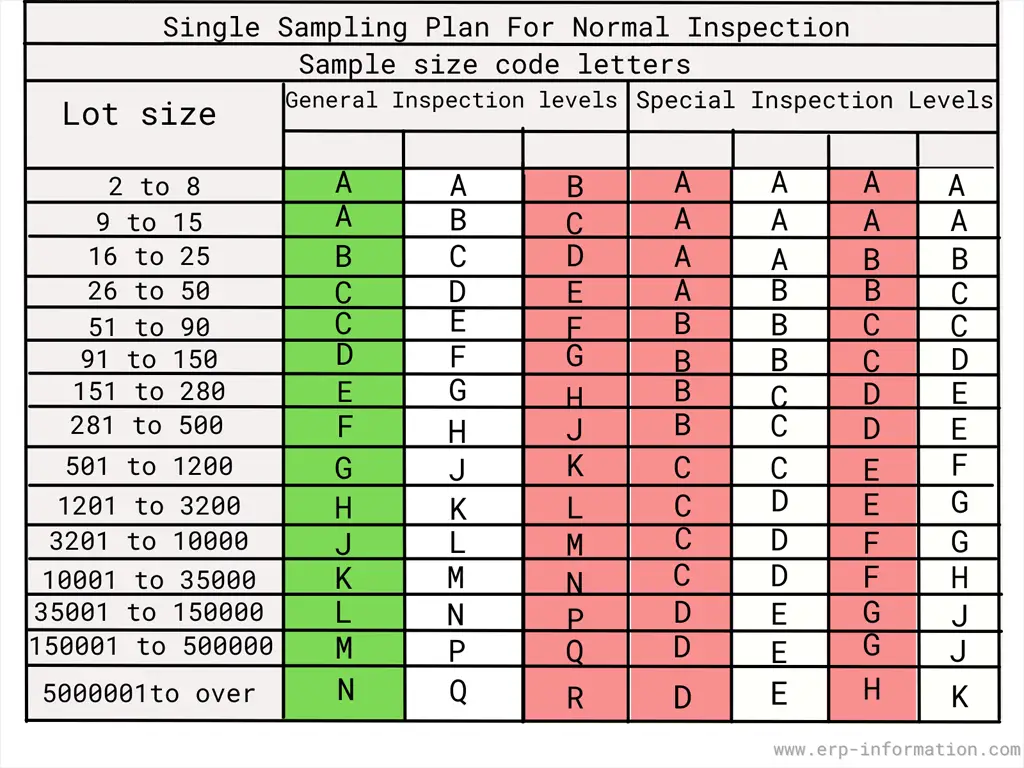
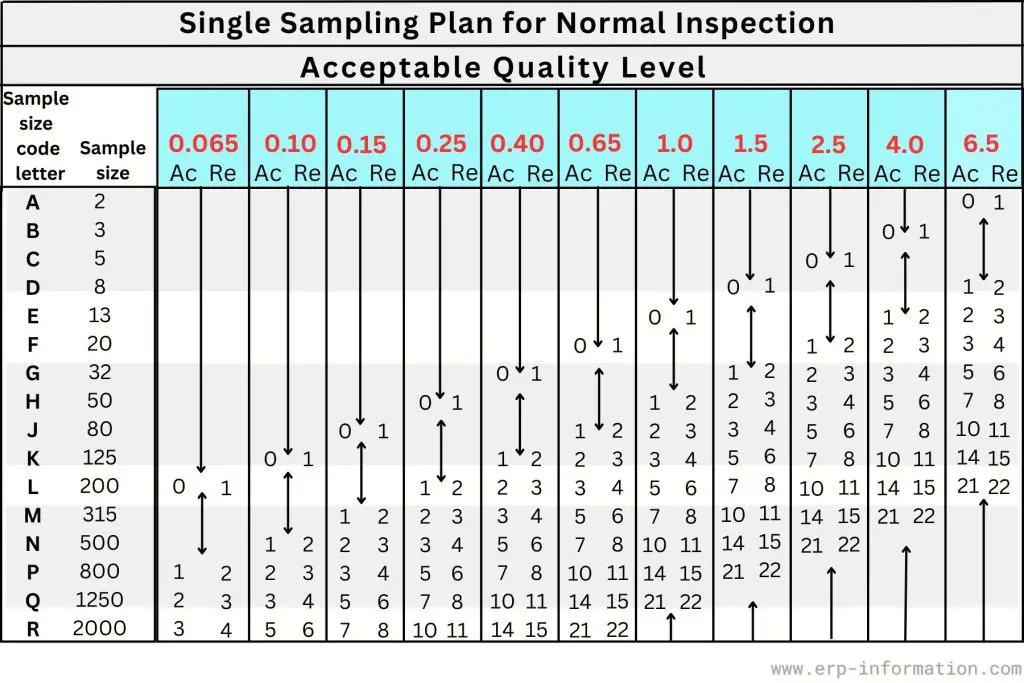
This table is an essential tool used in quality control processes to determine the number of samples to inspect and the maximum number of allowable defects in a batch. It is based on the (International Organization for Standardization) ISO 2859 standard.
Structure
Lot Size: Lot size is the number of products that you ordered. Suppose you order different products. Each product is to be considered as a separate lot.
Sample Size Code Letters: The tables start with a table of code letters, which are based on the batch size. This code letter is used to find the corresponding sample size.
Sample Sizes: The sample size section lists different sample sizes corresponding to various batch sizes and inspection levels. It is the number of units that you take randomly for inspection.
Acceptance and Rejection Numbers: For each sample size and AQL value, the table specifies the maximum number of defects allowed (acceptance number) and the number at which the batch is rejected (rejection number).
Inspection Levels
General Inspection Levels: These are divided into Level I, II, and III, with Level II being the most common for general inspections. Level I is used for less stringent inspections, while Level III is for more stringent ones.
Special Inspection Levels: These levels (S-1, S-2, S-3, S-4) are used for smaller sample sizes when the inspection is less critical.
Choosing an AQL
This value represents the maximum percentage of defects that is considered acceptable during random sampling inspection. Usually set in terms of percentage.
Common values are 0.1%, 0.65%, 1.0%, and 2.5%, depending on the product’s criticality and industry standards. A lower AQL value means stricter quality requirements, while a higher AQL value indicates more tolerance for defects.
Sampling Process
Two main sampling processes are used when using Acceptable Quality Level tables.
Acceptance sampling
Acceptance sampling is a type of sampling where a certain number of units from each lot are selected and inspected. If the sample meets all requirements, the entire lot is accepted. If the selection does not complete all conditions, the lot is rejected.
Inspection sampling
Inspection sampling involves inspecting each unit in the lot. Acceptable Quality Limit tables determine if enough units should be inspected and, if so, how many.
Methods of Sampling
- Single sampling: Only one sample will be taken for inspection out of the n-number samples in this sampling method. The whole batch will be rejected if any fault is identified in that sample.
- Double sampling: This method is the continuation of 1st method. That means one more sample will be taken for inspection when the first sample fails.
- Sequential sampling: In this method, every item from the sample will be tested. It is a precise method.
- Multiple sampling: This method is an add-on to double sampling. This method will take a random sample size of n from many sizes of N.
- Skip lot sampling: In this method, a fraction of the lots will be inspected.
FAQs
What is an AQL Table?
It is a chart that shows the number of defects allowed in a product before it is considered unacceptable. In addition, the table is used to determine whether a sample of some product meets specific requirements.
It provides the minimum sample sizes needed to detect specific percentages of defects at some confidence level.
What is the Normal Acceptable Quality Level?
It is the maximum percentage of defects considered acceptable in a given product or service. The manufacturer or provider typically sets this level, which may vary depending on the product or service type.
For example, a higher one may be tolerated for less expensive or more commonly available products. In comparison, a lower one may be expected for luxury items or rare items.
A higher one may be acceptable for products used for personal use, while a lower one may be required for products used in a critical application.
Ultimately, the decision of what is considered an acceptable level of defects is up to the manufacturer or provider. It is vital to understand the Normal Acceptable Quality Level before purchasing.
Conclusion
Acceptable Quality Level is a vital tool in quality control, enabling manufacturers to maintain high standards while balancing efficiency. By setting clear limits on acceptable defects and using systematic sampling methods, companies can ensure that their products meet the necessary quality criteria before reaching customers.
This post discussed an Acceptable Quality Level and how it is used with product inspection. We also reviewed the three categories of defects found in a lot and gave an example of how they can be expressed.
Finally, we looked at its table and discussed detecting specific percentages of defects. Hoping this post was helpful to you!
